
Overview
If you use a CardPointe Integrated Terminal device, you can leverage the power of the CardPointe Virtual Terminal, which allows you to accept payment cards using your computer's web browser and an internet connection. Using the Virtual Terminal, you can initiate card-not-present and card-present authorizations, captures, settlements, voids, and refunds. In addition, you can easily and securely save customer payment profiles.
Prerequisites
Before you can begin processing transactions on your CardPointe Integrated Terminal device with the CardPointe Virtual Terminal, you must complete the following actions to setup and configure the device for use with your CardPointe account:
To further reduce your PCI scope, you can disable the ability to enter payment account numbers (PANs) on the CardPointe Virtual Terminal. By doing this, you will be prompted to manually key the customer's credit card number into the terminal device using the terminal keypad, which removes your workstation keyboard from PCI scope and instantly tokenizes the payment card data using CardSecure.
To activate and configure your CardPointe Integrated Terminal device:
-
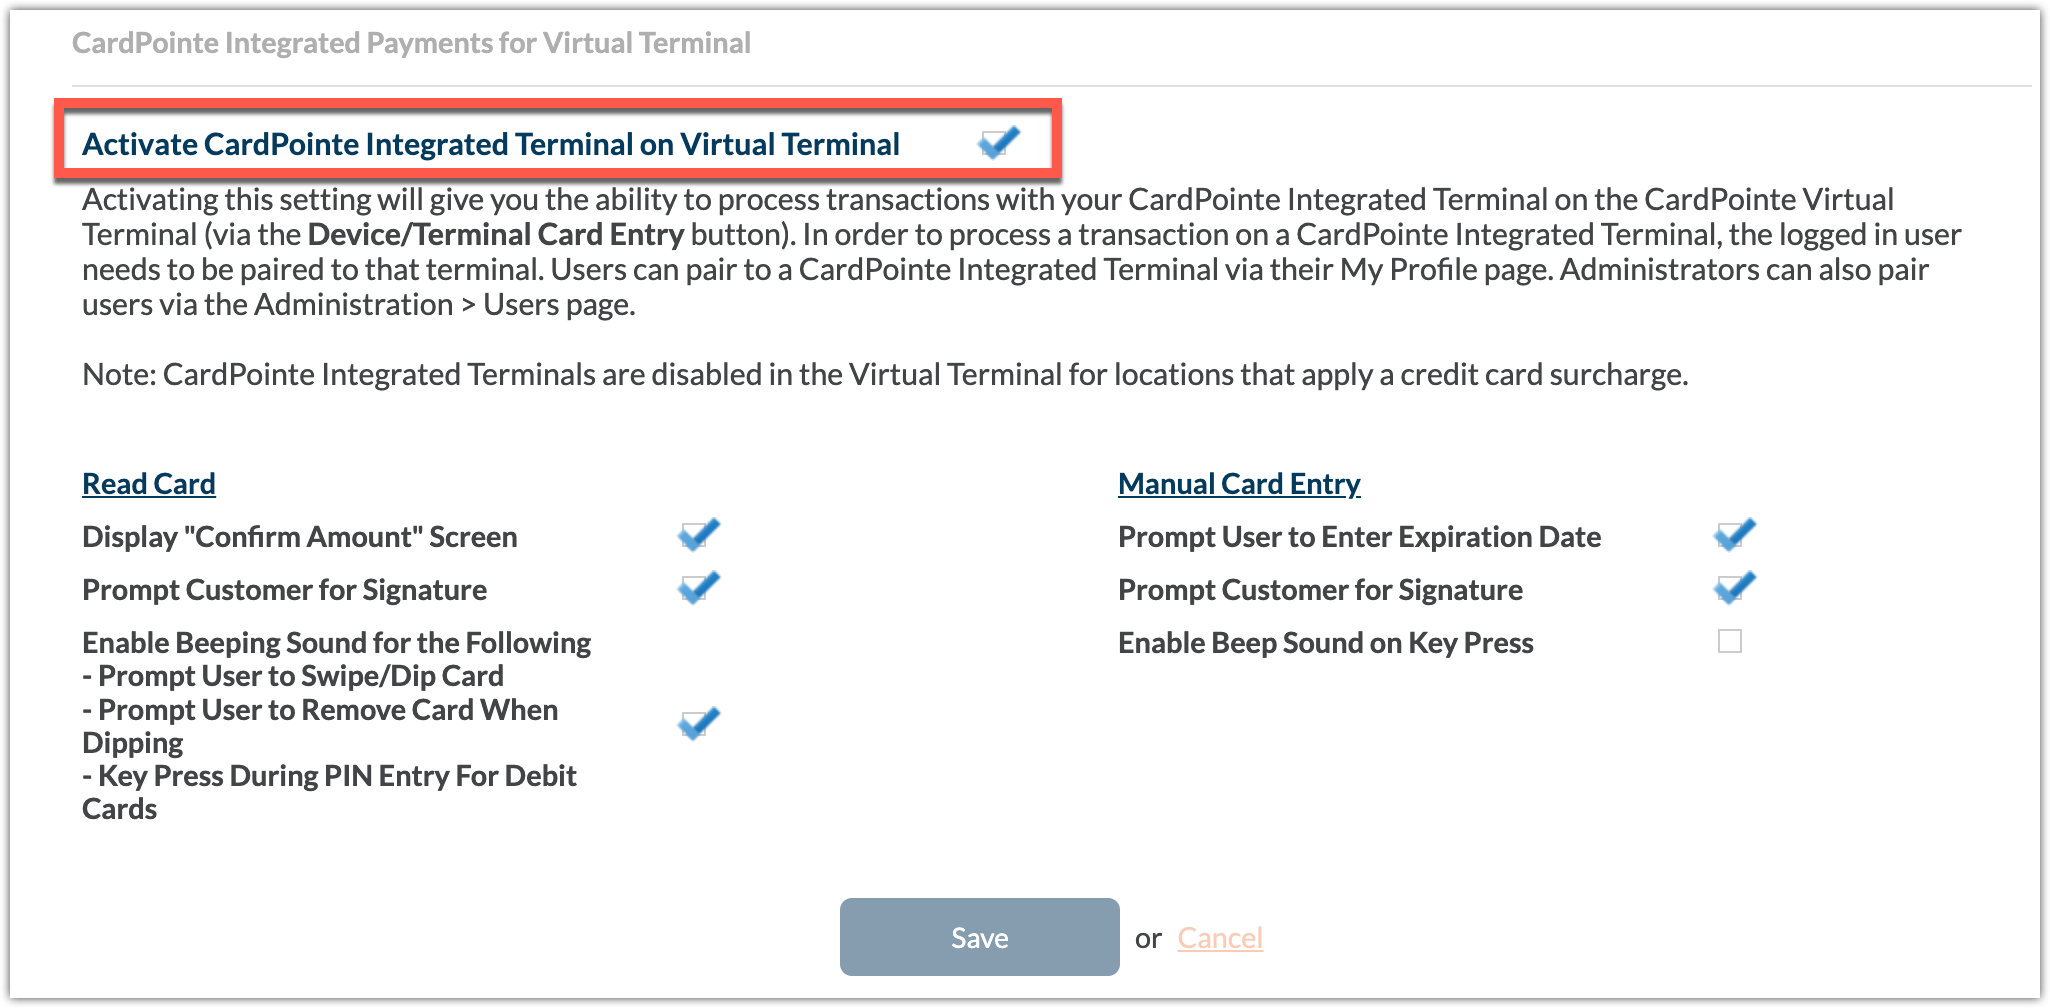
Navigate to Administration > Virtual Terminal and scroll down to the CardPointe Integrated Payments on Virtual Terminal section.
-
Check the box next to Activate CardPointe Integrated Terminal on Virtual Terminal. Enabling this setting links your CardPointe Integrated Terminal with the CardPointe Virtual Terminal.
-
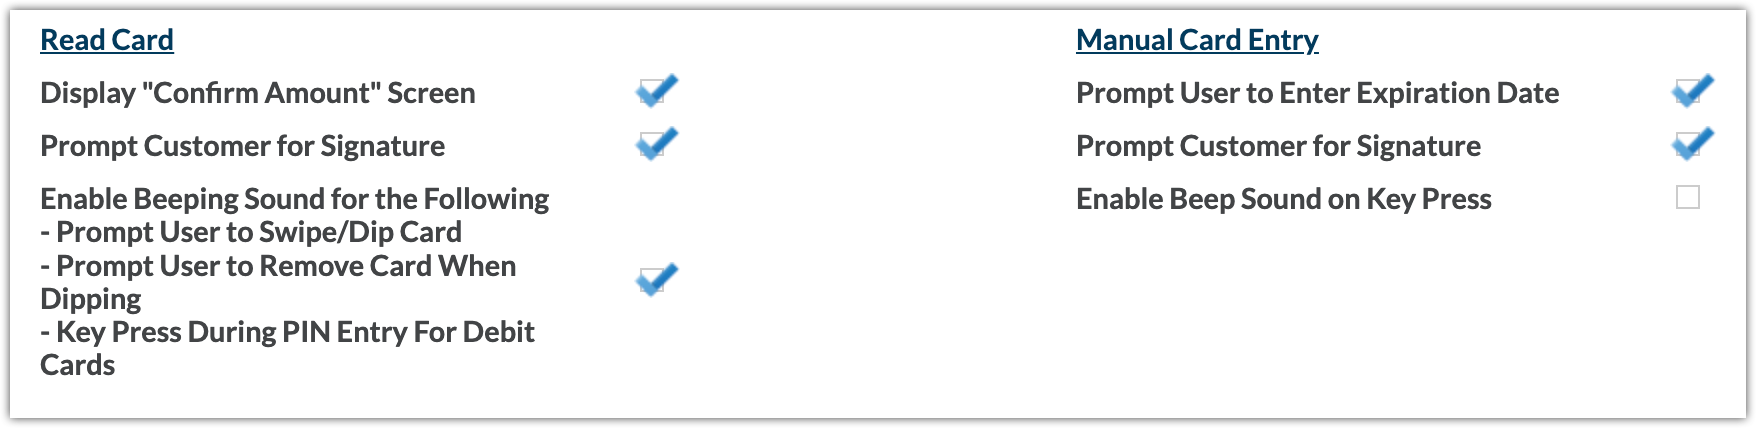
You can enable additional settings under the Read Card and Manual Card Entry sections by checking the boxes next to each setting. These settings impact how your customers interact with the CardPointe Integrated Terminal during checkout. For example, if you wish to disable the prompt for the customer's signature, simply uncheck the Prompt Customer for Signature boxes under Read Card and Manual Card Entry sections.
-
When finished, click Save.
You're almost ready to use your CardPointe Integrated Terminal device with the CardPointe Virtual Terminal. You just need to pair your CardPointe user accounts to the CardPointe Integrated Terminal device, and then you're ready to process!
Pair CardPointe User Accounts to CardPointe Integrated Terminals
Now that you've activated and configured the CardPointe Integrated Terminal to work with the CardPointe Virtual Terminal, you are ready to connect (pair) your CardPointe user account(s) to the CardPointe Integrated Terminal. Please note that you must first activate CardPointe Integrated Terminal with the Virtual Terminal before you can proceed with pairing users to the CardPointe Integrated Terminal device(s) in CardPointe.
Pair CardPointe User Accounts to a CardPointe Integrated Terminal (Admins Only)
If you are an admin user, it's easy to link the CardPointe users associated with your account to a CardPointe Integrated Terminal(s).
To pair user accounts to a CardPointe Integrated Terminal, do the following:
-
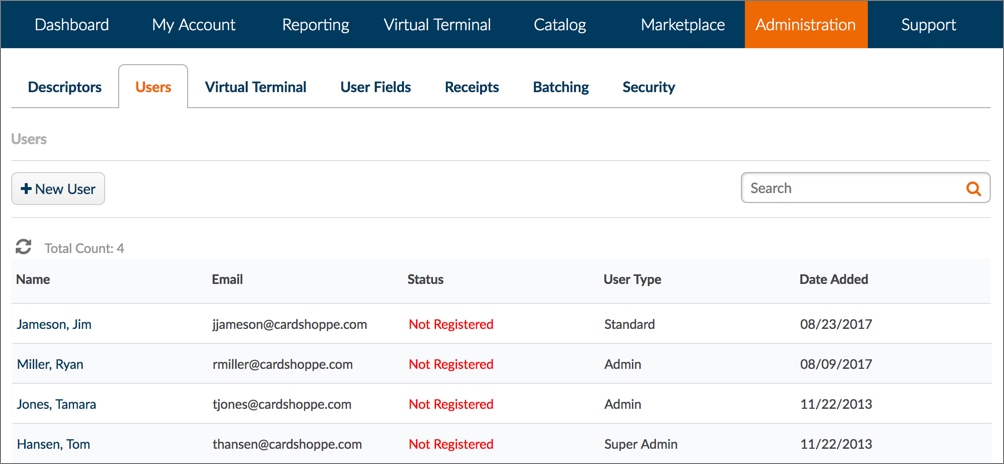
Navigate to Administration > Users.
-
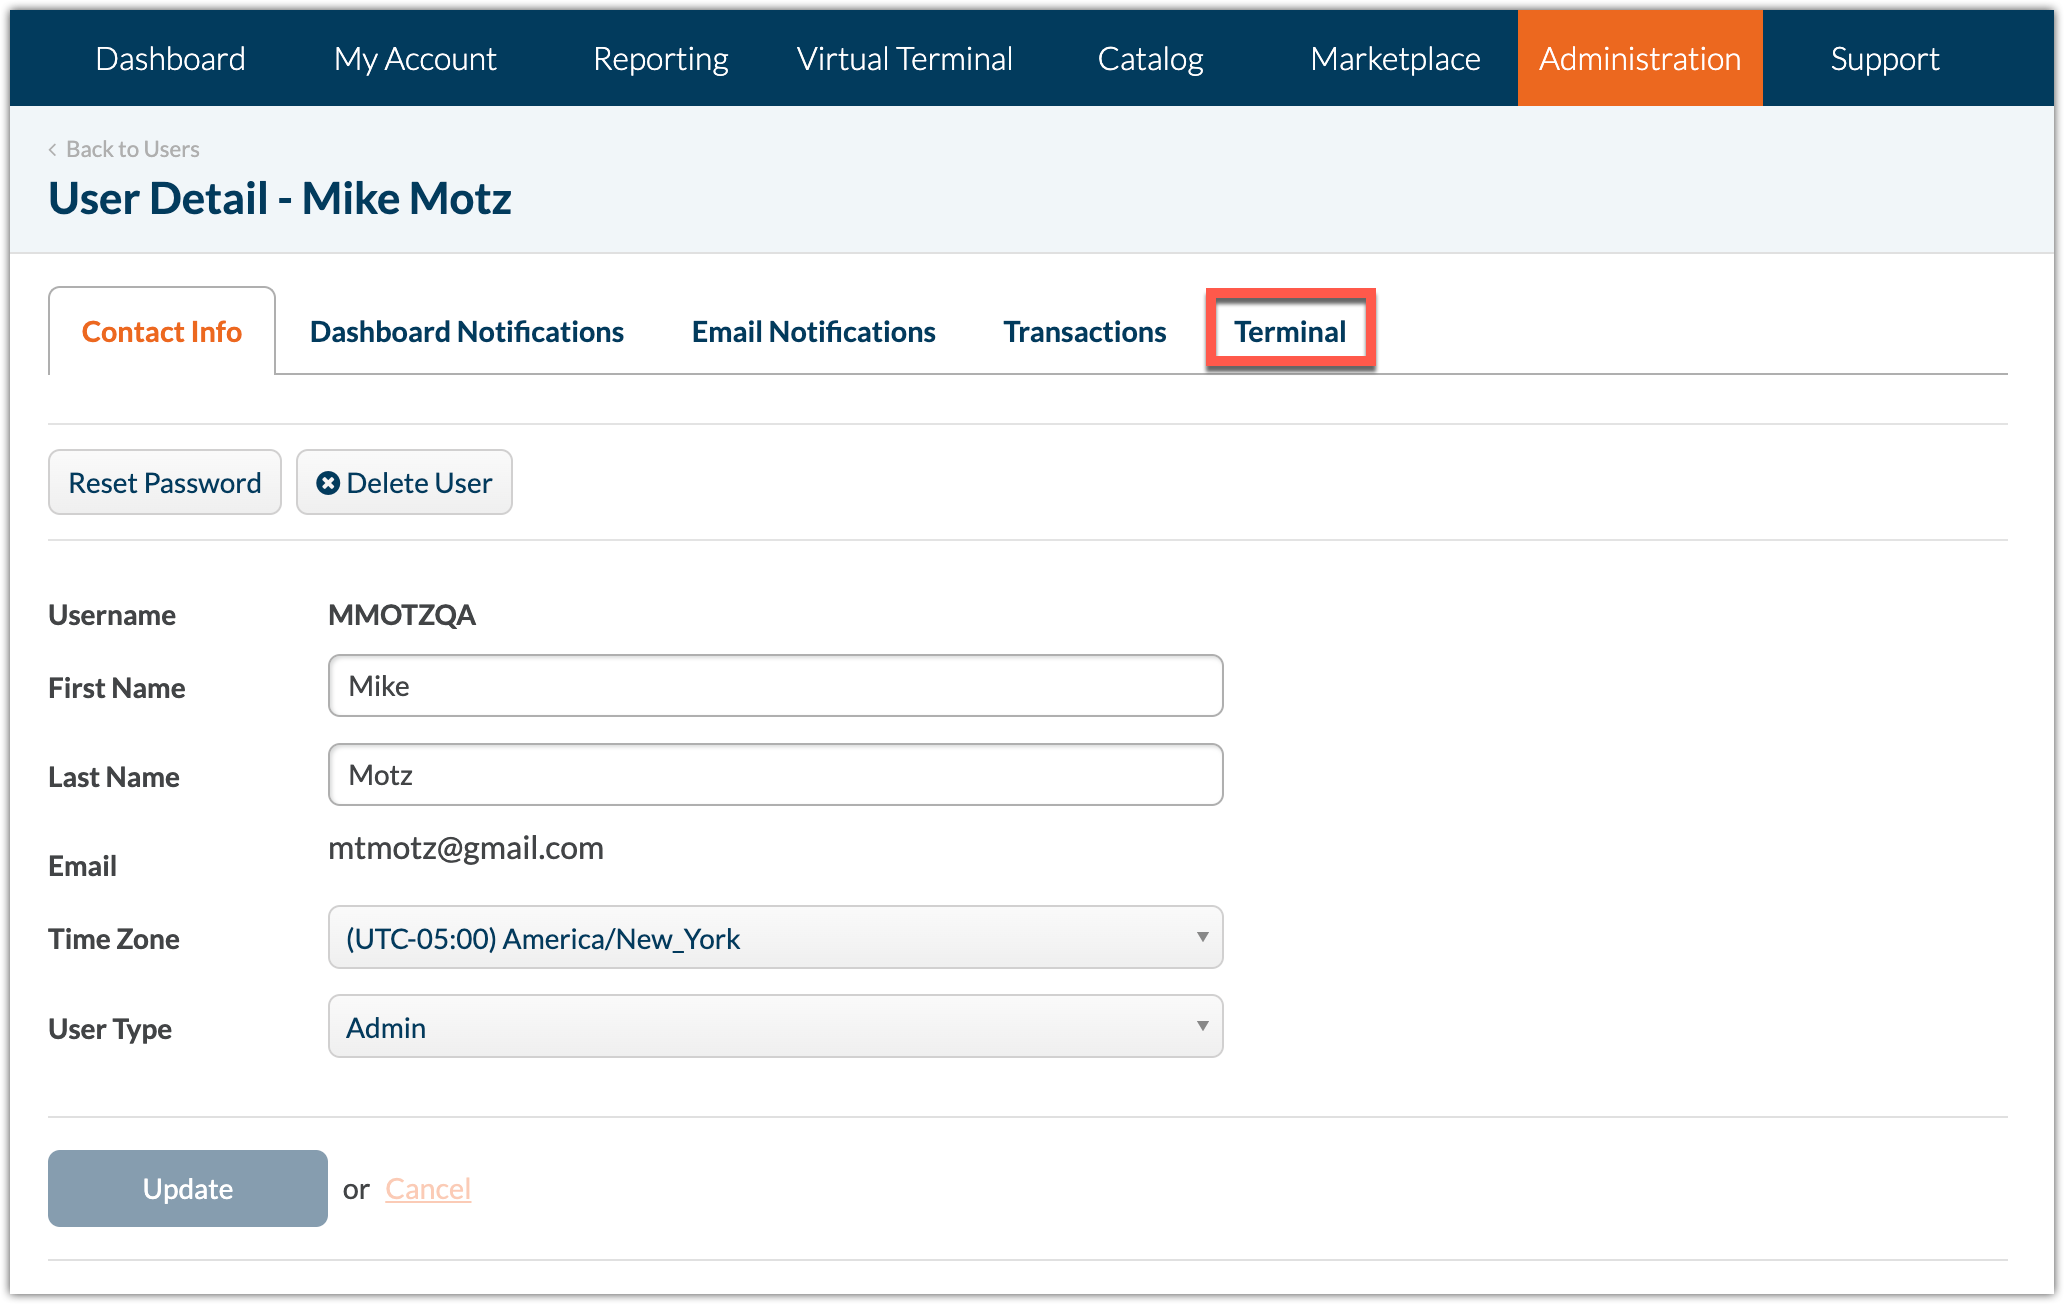
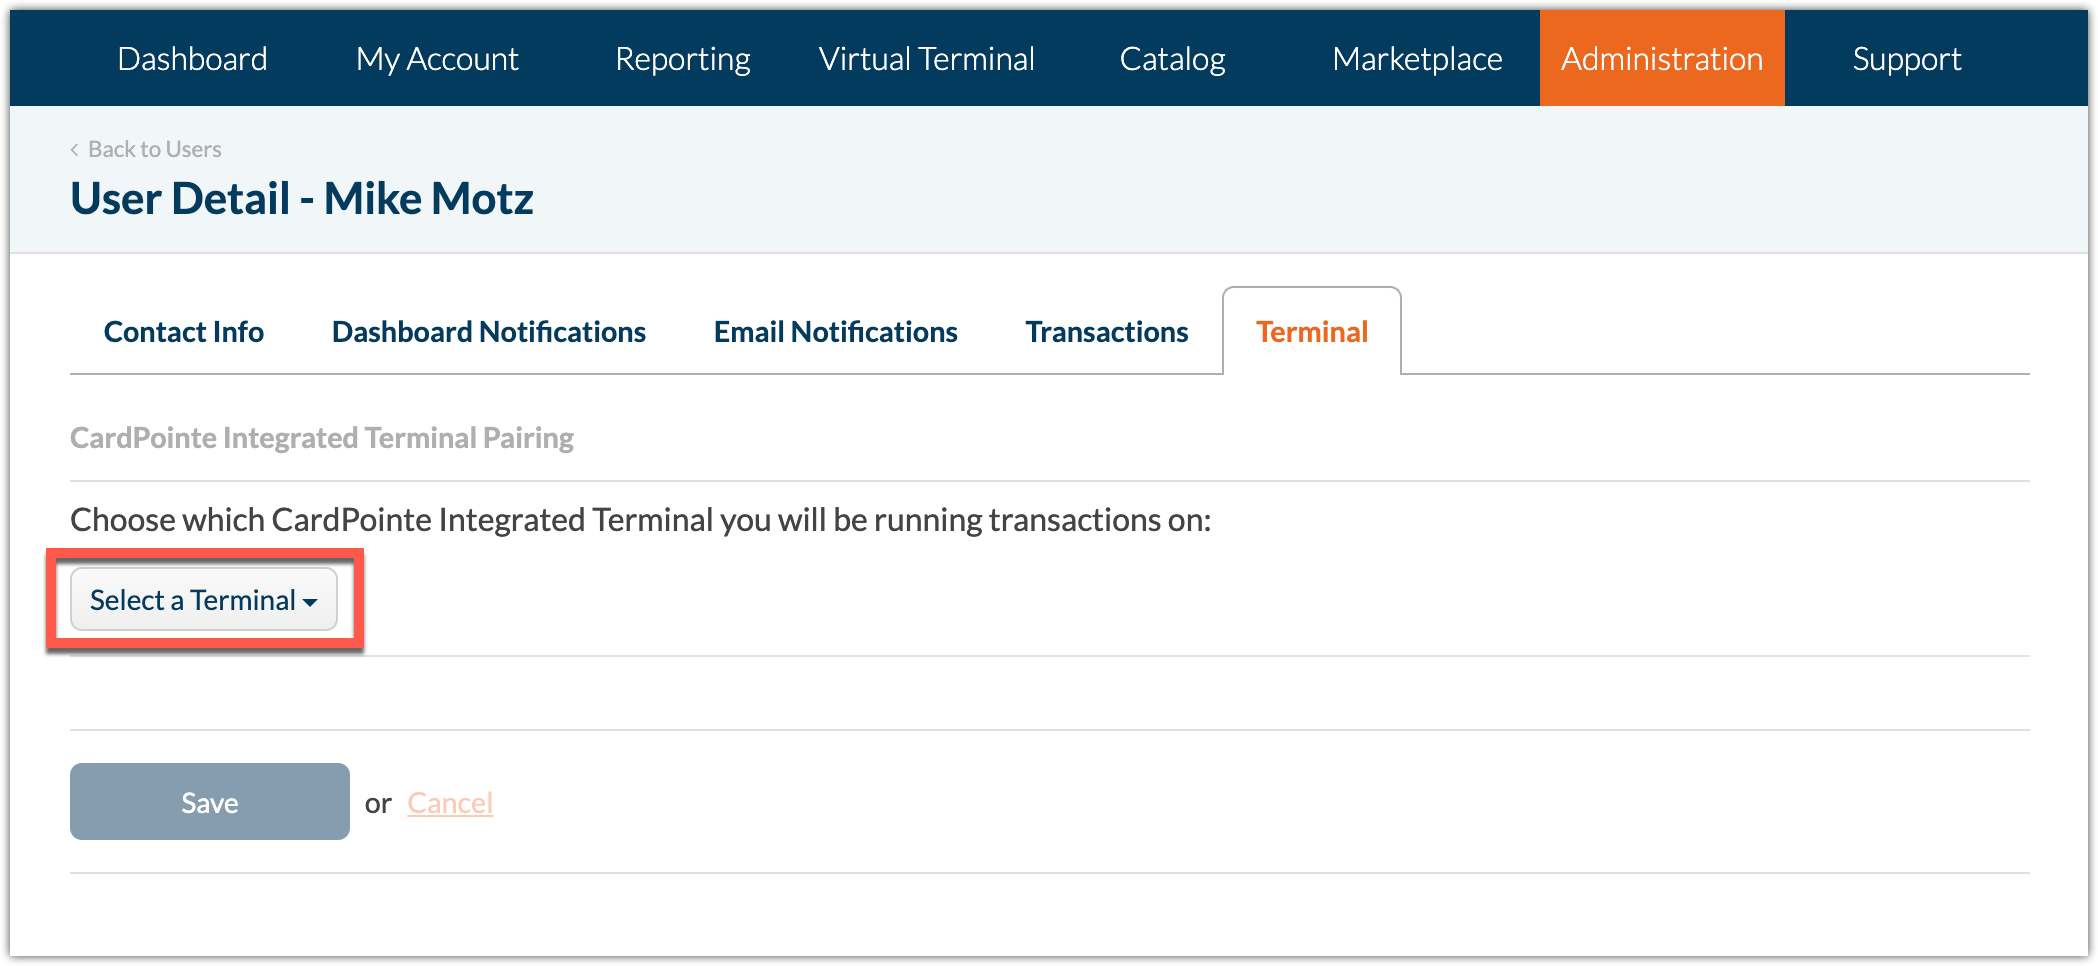
Click the name of a user that you wish to pair to a CardPointe Integrated Terminal to display the "User Detail" screen.
-
Select the Terminal sub-tab.
-
Click the Select a Terminal dropdown.
-
Select the CardPointe Integrated Terminal that you wish to pair the user to from the dropdown list. The list displays the terminal hardware serial number (HSN) of each CardPointe Integrated Terminal that is associated with your merchant account.
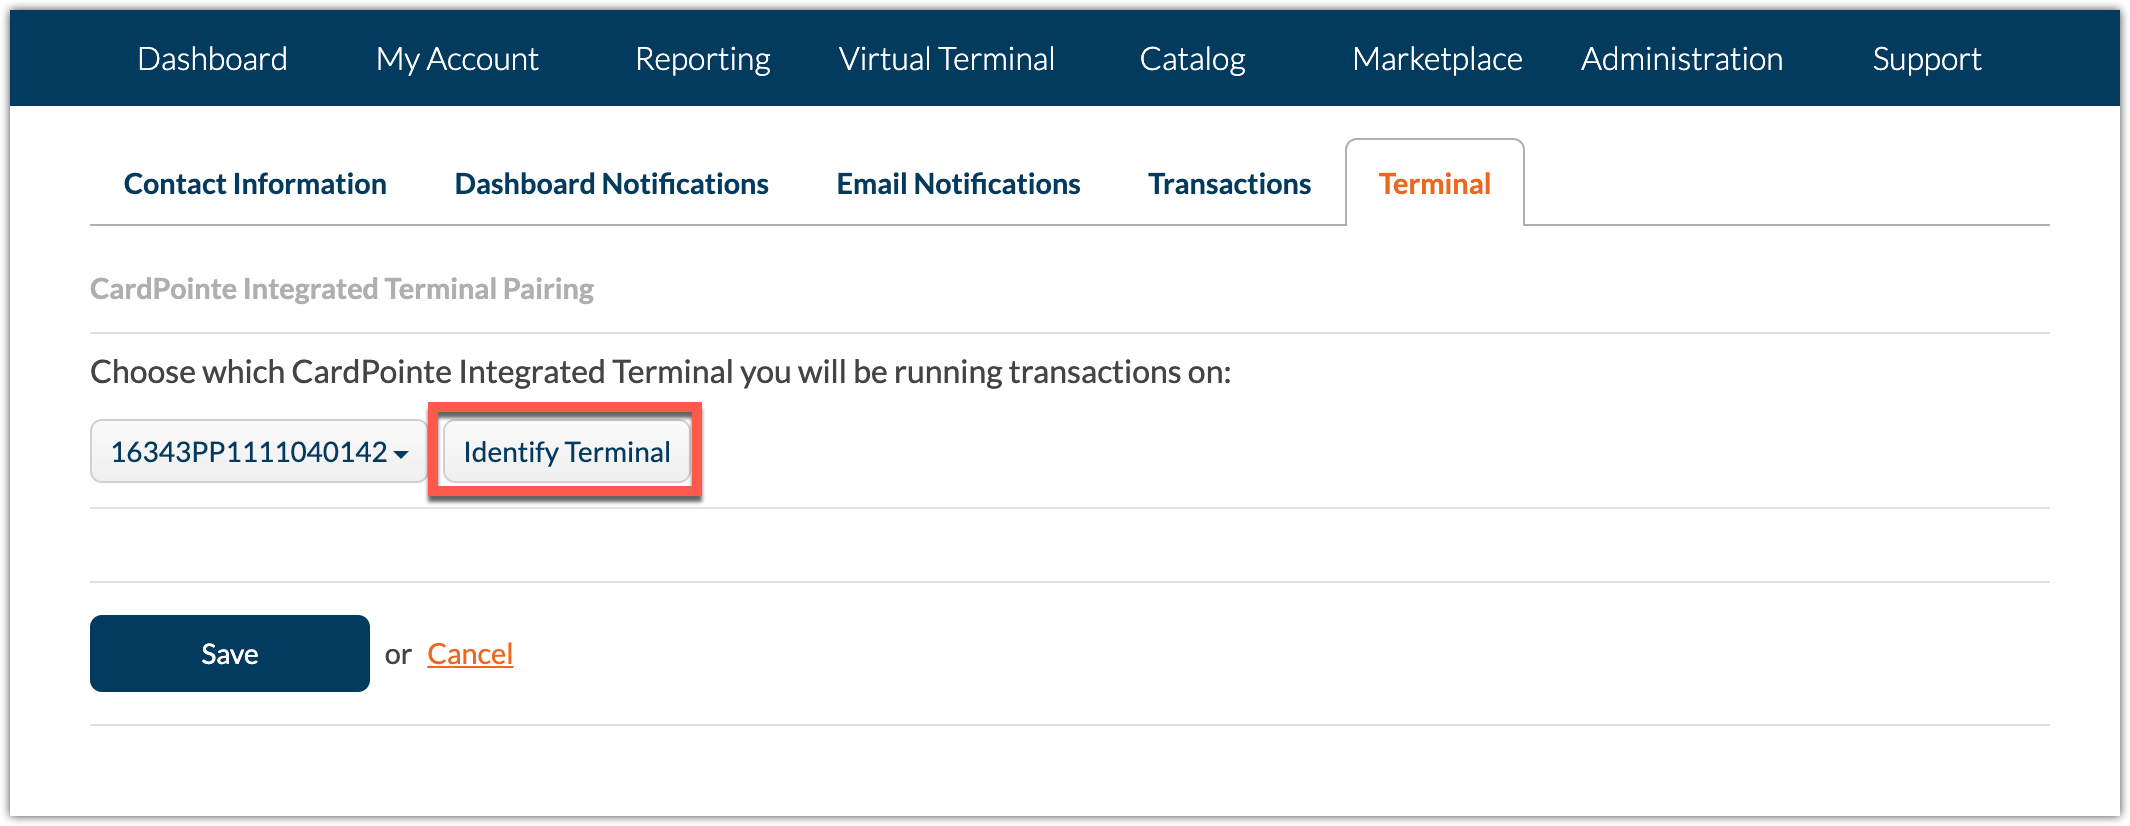
If you have multiple CardPointe Integrated Terminals and are unsure of which terminal to choose from the list, you can locate the desired terminal by clicking the Identify Terminal button in CardPointe. Upon clicking this button, the corresponding CardPointe Integrated Terminal screen will display the Terminal Name and the Terminal HSN on its screen.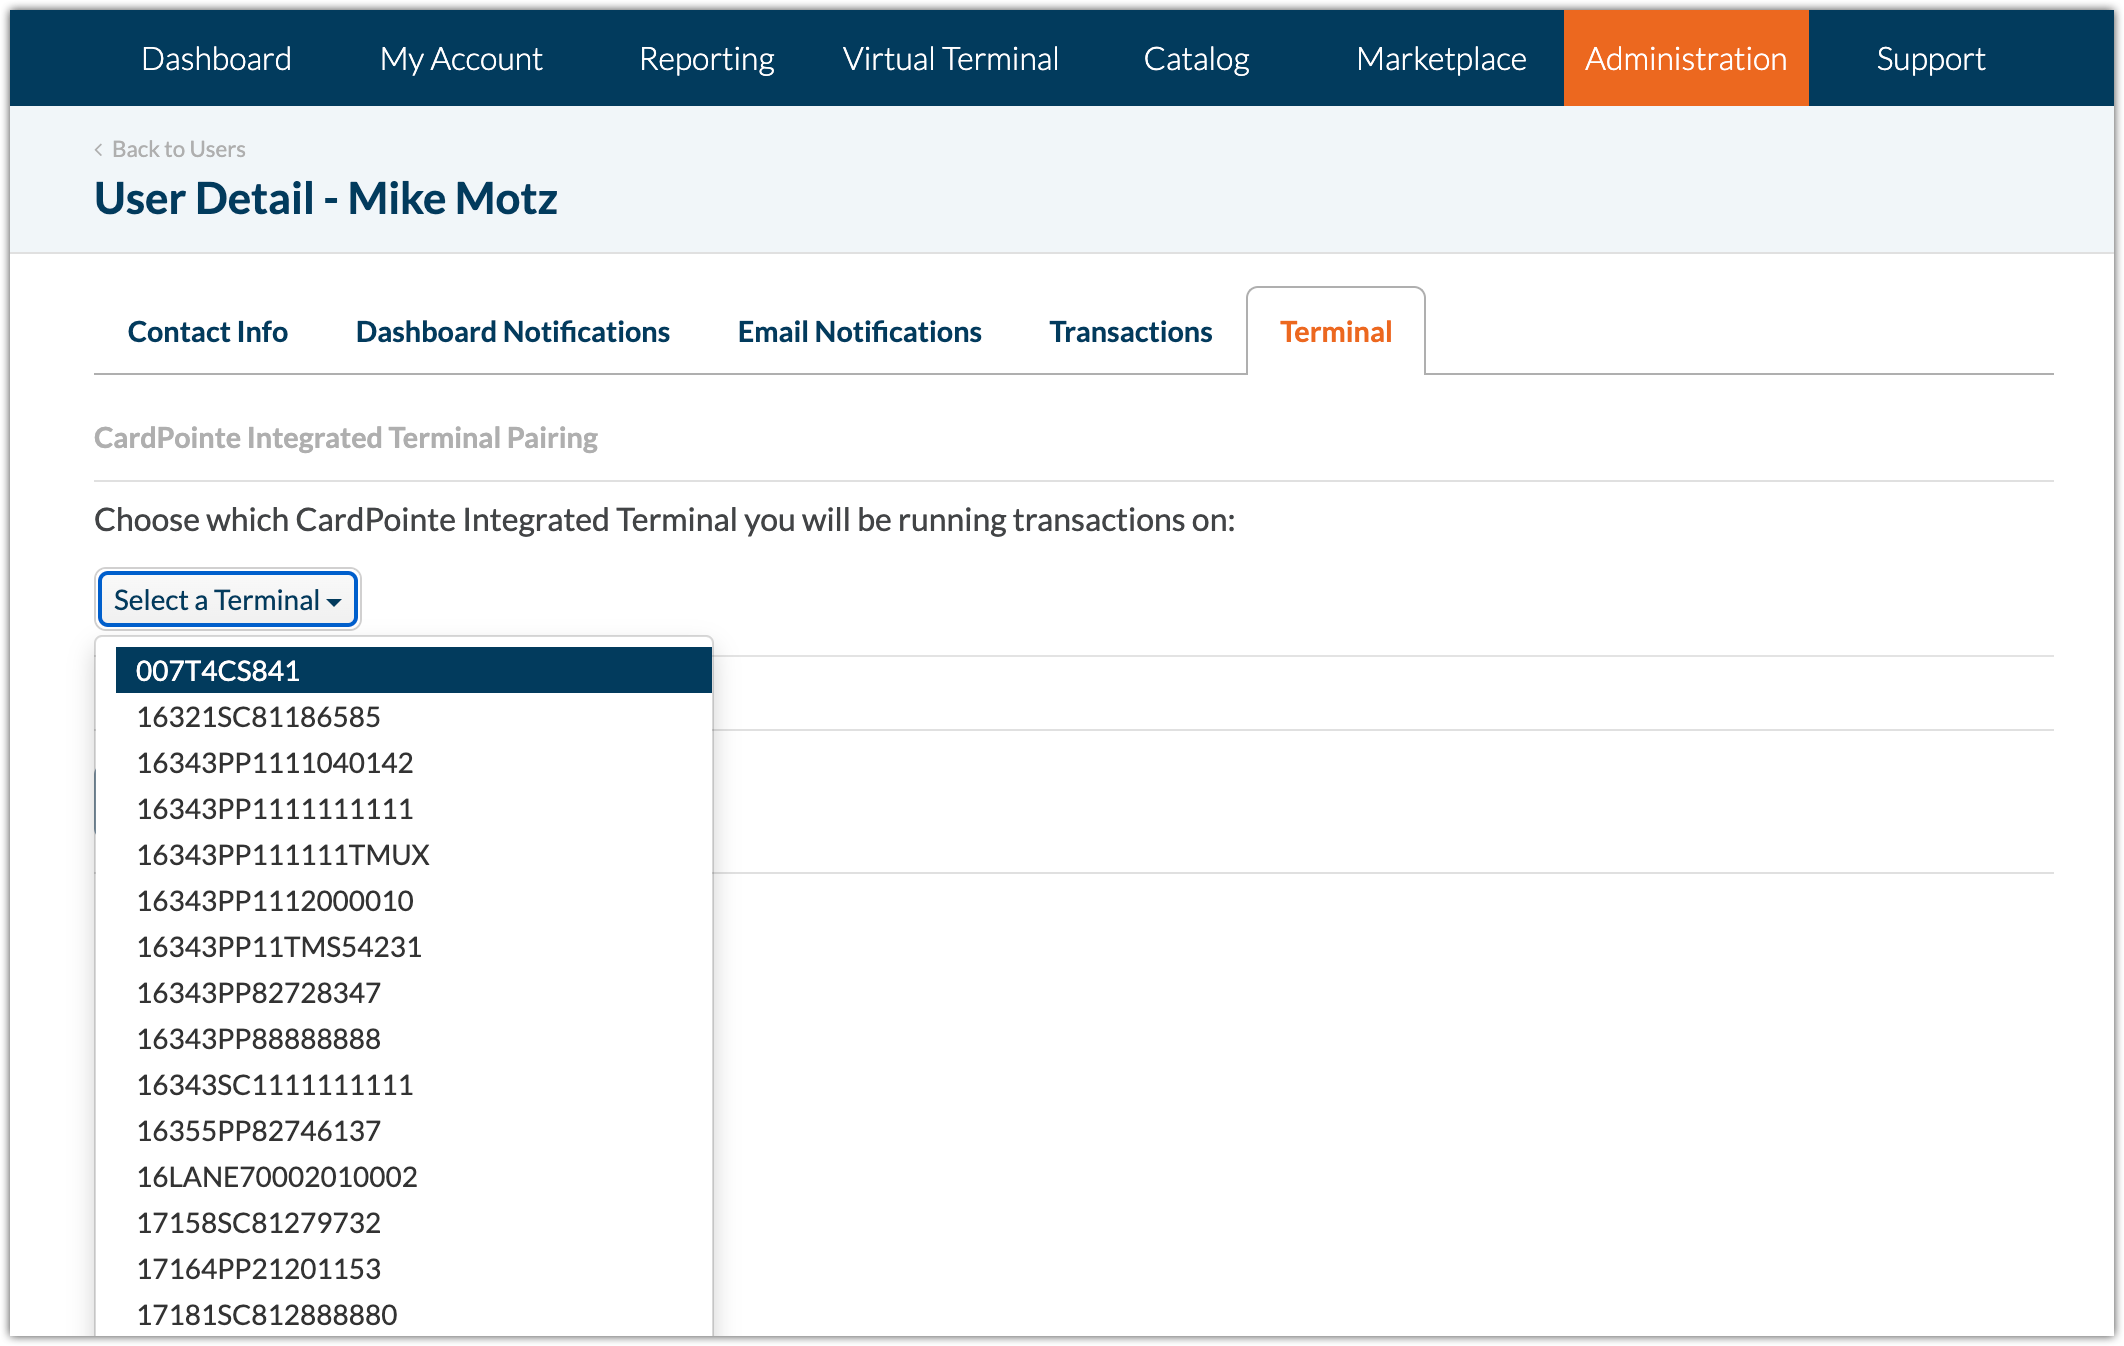
-
When finished pairing the user to the CardPointe Integrated Terminal device, click Save. The user is now ready to process transactions using the CardPointe Integrated Terminal device and the CardPointe Virtual Terminal. You can repeat this process as needed to pair additional CardPointe users to your CardPointe Integrated Terminal device(s).
Pair Your CardPointe User Account to a CardPointe Integrated Terminal
You can easily pair your CardPointe user account to a CardPointe Integrated Terminal to use that terminal to process transactions in conjunction with the CardPointe Virtual Terminal. Please note that you must first activate CardPointe Integrated Terminal with the Virtual Terminal before you can proceed with pairing users to the CardPointe Integrated Terminal device(s) in CardPointe.
-
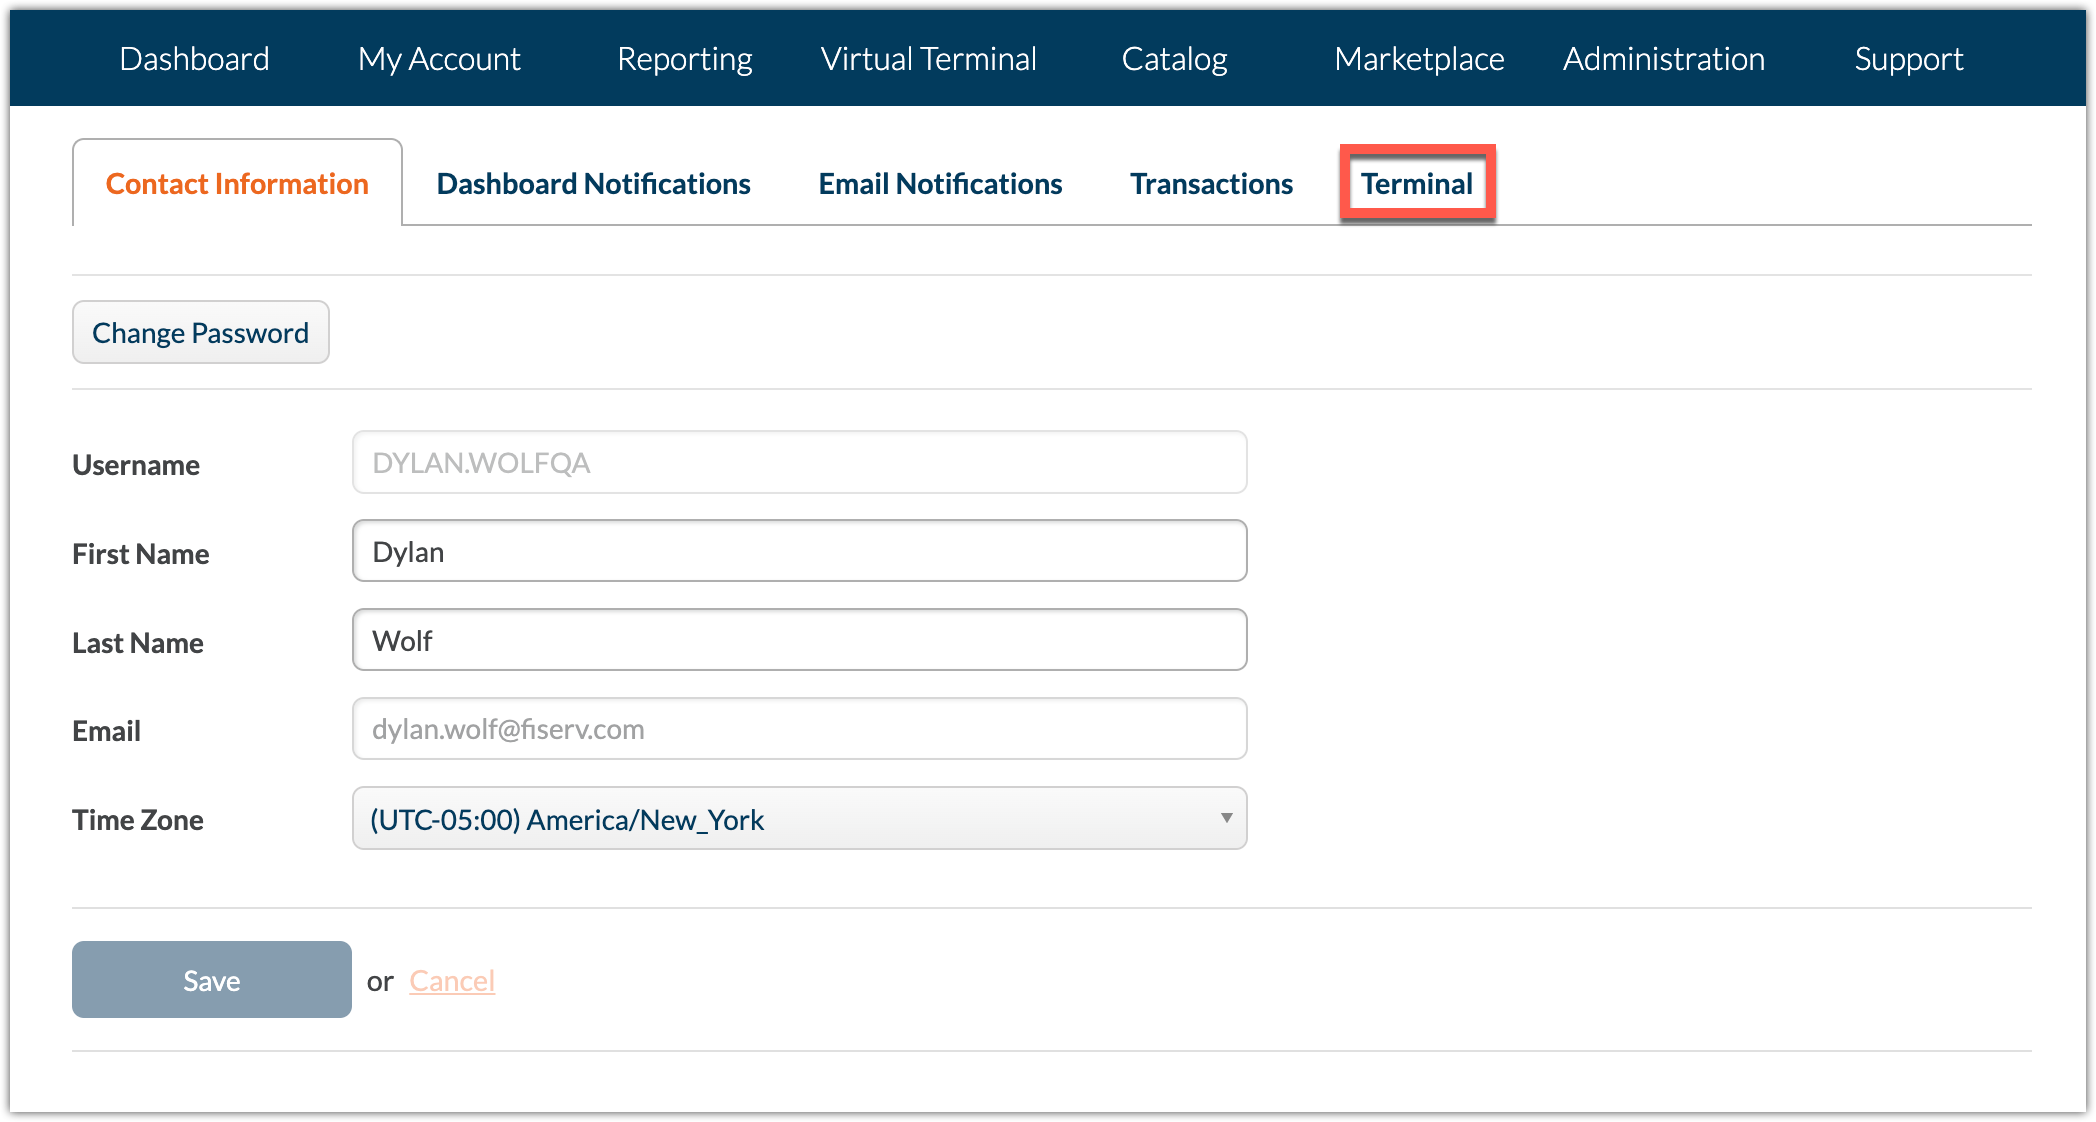
At the top-right of CardPointe, click the dropdown next to your username and select My Profile.

-
Click the Terminal sub-tab.
-
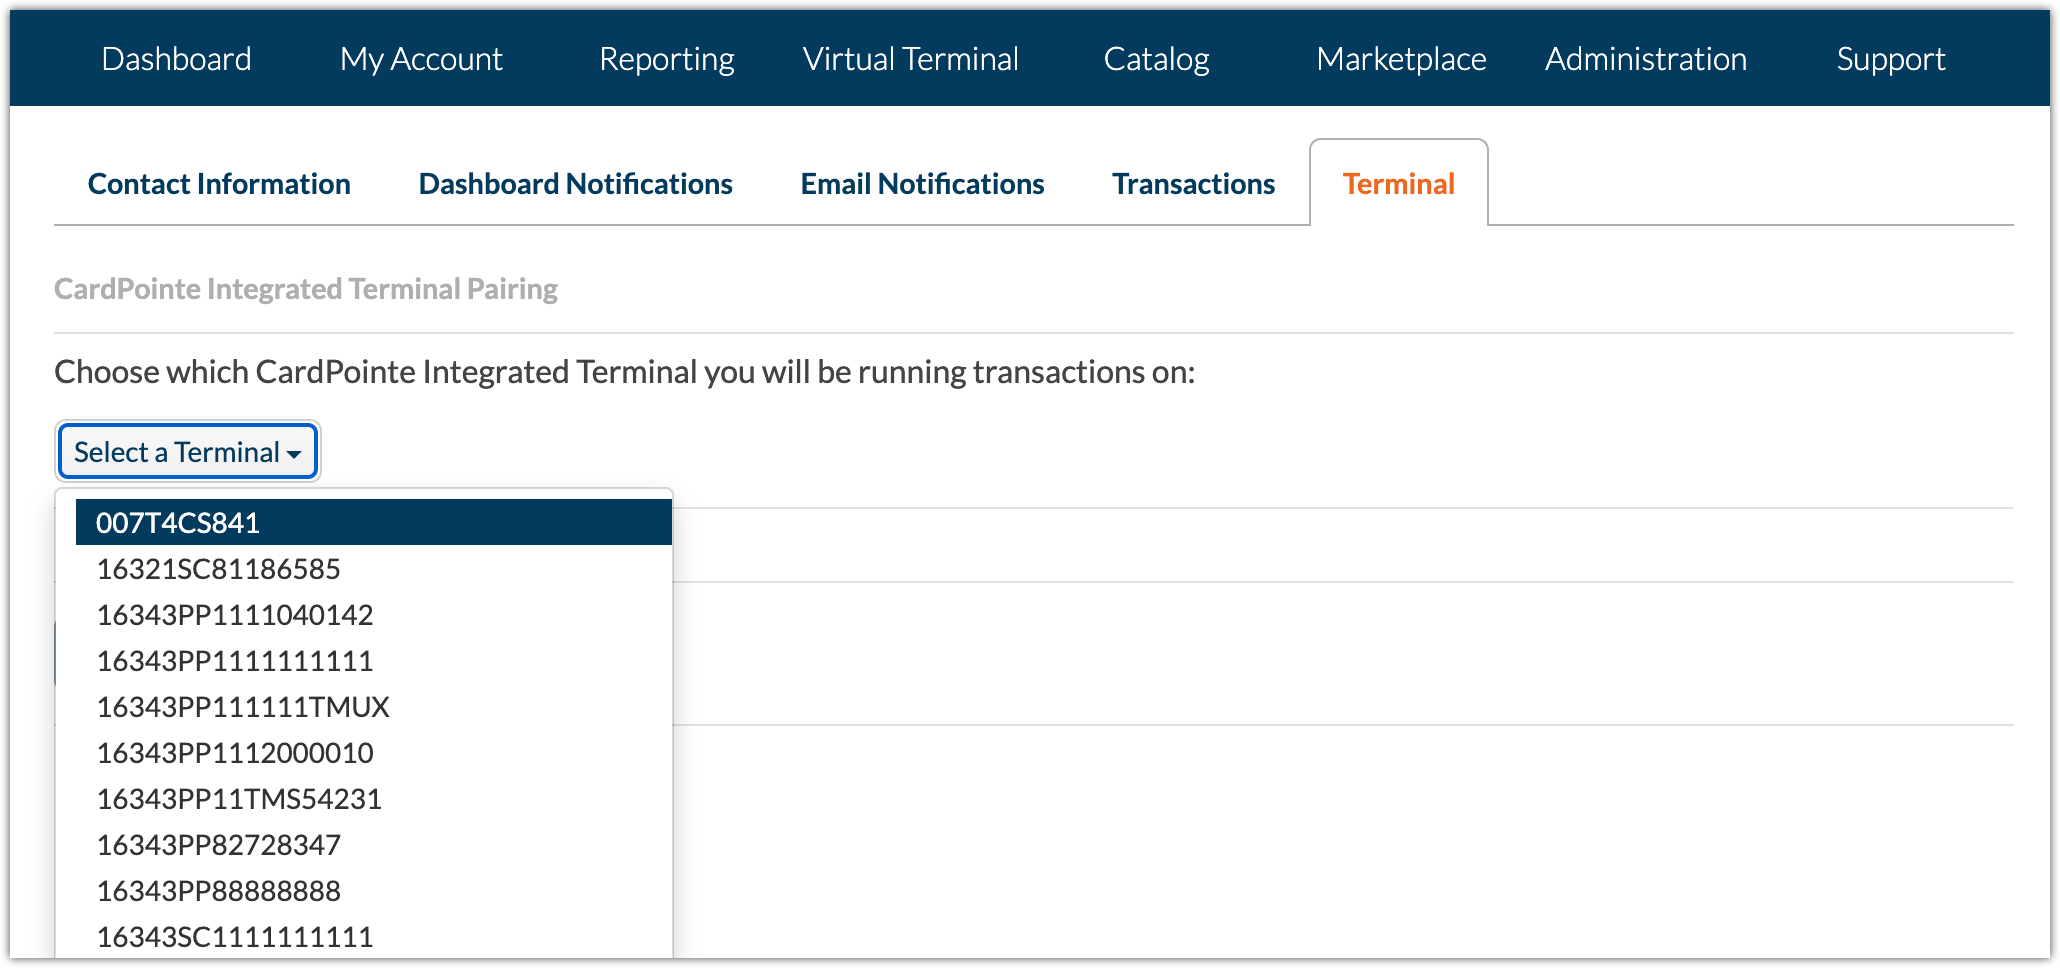
Click the Select a Terminal dropdown and select the CardPointe Integrated Terminal that you wish to pair the user to from the dropdown list. The list displays the terminal hardware serial number (HSN) of each CardPointe Integrated Terminal device that is associated with your merchant account.
-
If you have multiple CardPointe Integrated Terminals and are unsure of which terminal to choose from the list, you can locate the desired terminal by clicking the Identify Terminal button in CardPointe. Upon clicking this button, the corresponding CardPointe Integrated Terminal screen will display the Terminal Name and the Terminal HSN on its screen.
-
When finished pairing your account to the CardPointe Integrated Terminal device, click Save. You are now ready to process transactions using the CardPointe Integrated Terminal device and the CardPointe Virtual Terminal.
To rename a terminal:
-
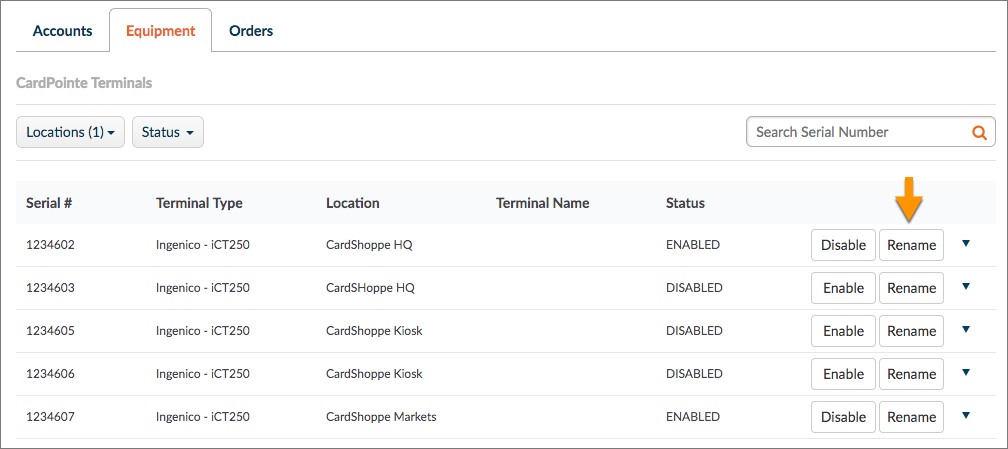
Navigate to My Account > Equipment.
-
Click the Rename button next to the desired terminal.
-
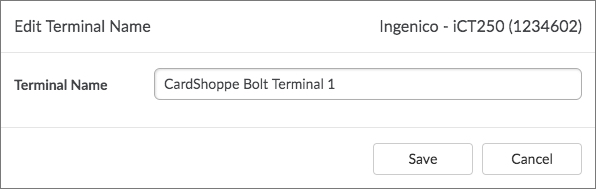
Enter a unique name for the terminal in the Terminal Name field.
-
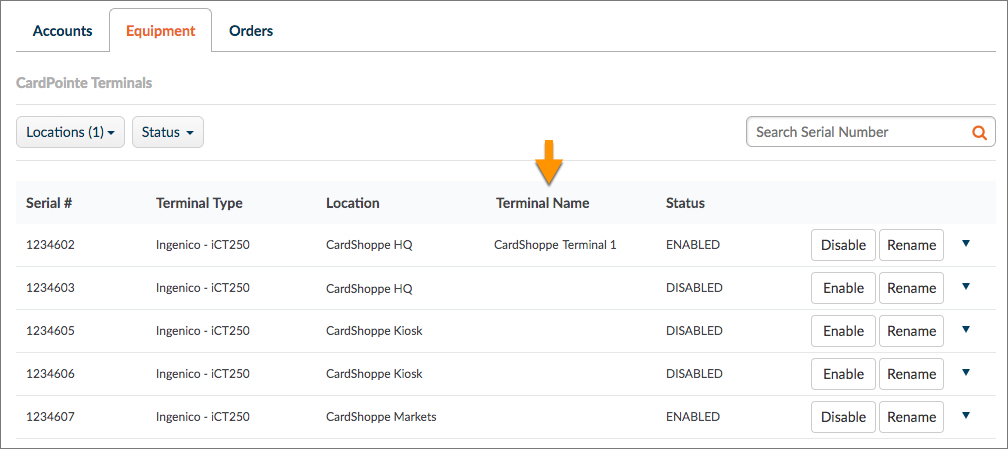
Click Save. The name of the terminal displays in the Terminal Name field.
-
Repeat this process for every terminal that you wish to rename.
To process transactions using the CardPointe Integrated Terminal and the CardPointe Virtual Terminal:
-
Navigate to the Virtual Terminal screen.
-
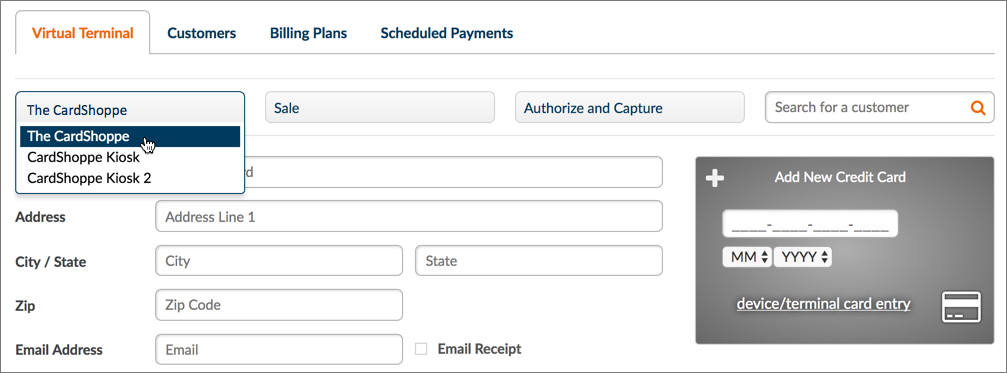
If you have multiple merchant IDs, select the desired merchant ID from the location dropdown.
-
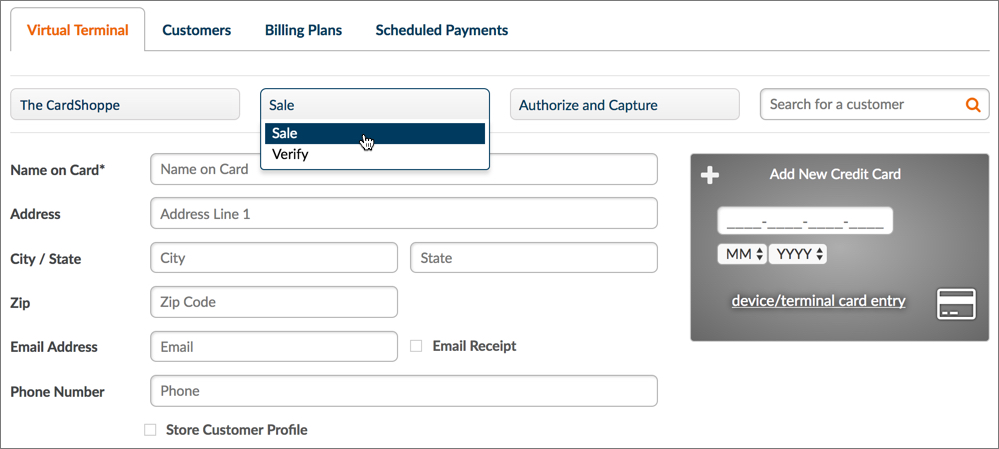
Choose whether you are processing a sale or verifying the availability of funds.
-
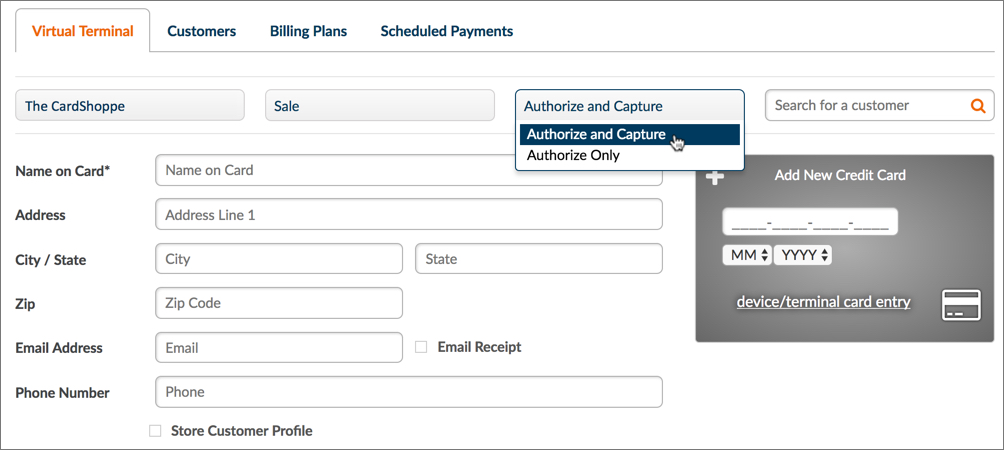
Choose whether you are performing an authorize and capture, or an authorize only.
-
Enter the sale amount in the Subtotal field.

-
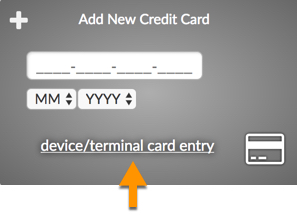
Click device/terminal card entry.
-
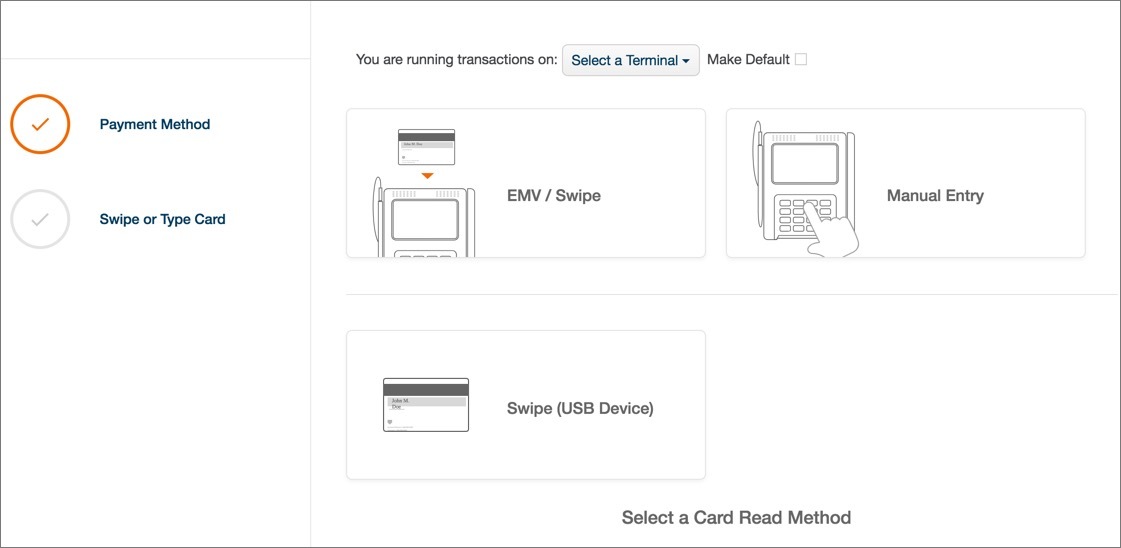
Select the card read method that will be used for the transaction. Options include:
- EMV/Swipe - Selecting EMV/Swipe requires the customer to either swipe or dip their card in the CardPointe Integrated Terminal.
- Manual Entry - Selecting Manual Entry requires you to manually enter the customer's payment card number using the CardPointe Integrated Terminal keypad.
- Swipe (USB Device) - Selecting Swipe (USB Device) requires you to swipe the customer's payment card using a supported USB card swiper (for example, the ID TECH Augusta).
-
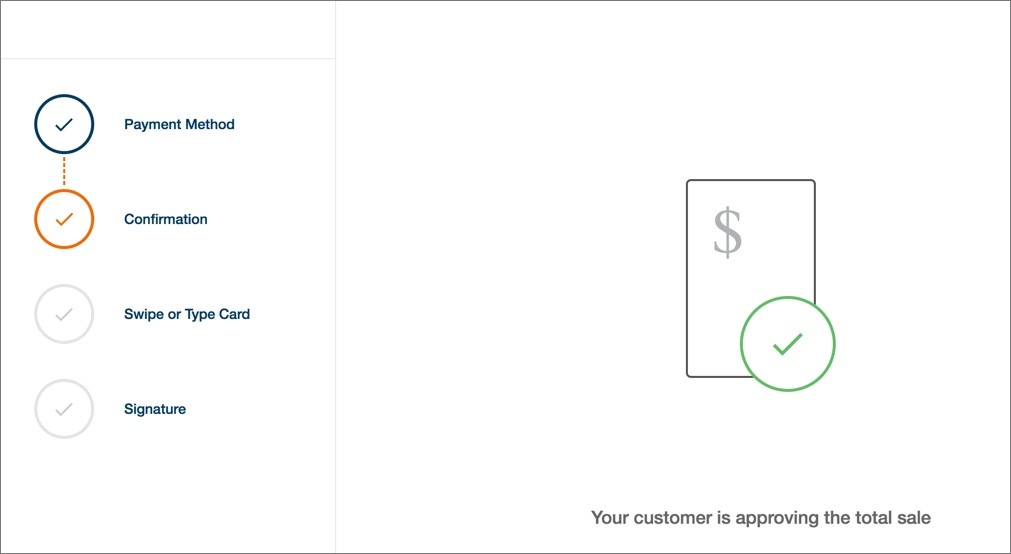
For EMV/Swipe transactions, the customer is then prompted to confirm the transaction total on the terminal screen, as indicated in CardPointe:
-
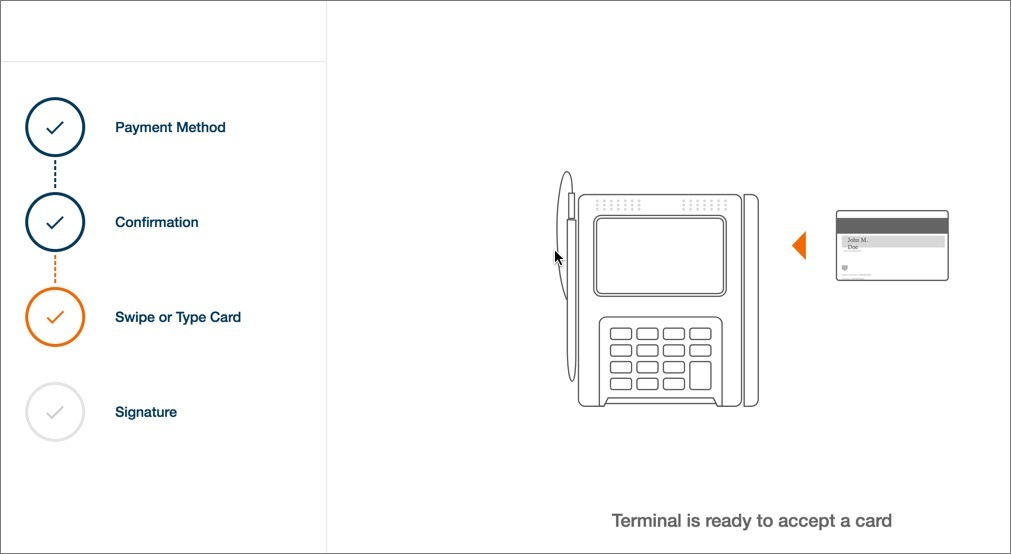
The terminal then prompts the customer to swipe or dip their payment card, as indicated in CardPointe:
-
Lastly, the customer is prompted to provide their signature on the terminal screen.
Customers will not be prompted to provide their signature if the "Prompt Customer for Signature" setting is disabled in CardPointe. See Process Payments with the Virtual Terminal and CardPointe Integrated Terminal for information on enabling/disabling this setting.
Order a CardPointe Integrated Terminal Device
Interested in a CardPointe Integrated Terminal device? Contact your sales partner or open a ticket in CardPointe to get the process started.